Showing posts with label ruffler foot. Show all posts

Sunday, September 11, 2011

Tutorial: Using a Ruffler Foot--Construction

I mentioned in the last post that there's a difference between learning to gather with a ruffler foot and learning to use it to make a garment.

My current favorite dress style involves LOTS of gathering


The first key to using a ruffler foot in a garment is that you want to gather and attach the ruffle in the flat.*  Instead of sewing strips of fabric to make a loop, which is gathered and then sewn on (say, to the bottom of a skirt), we'll sew the ruffles on to the front and back, then stitch the sides together.

Using a ruffler foot this way saves time, but does take some forethought.

We'll construct two pieces like this, then sew them together


The other key is to leave wiggle room when you cut your ruffle strips.  If you cut them the exact length you need, then you have to ruffle them exactly.  If you cut them a few inches longer, you don't have to spend so much time trying to be precise.  You can gather the strips quickly with your ruffler foot, attach them, and trim off any excess.


1.  Do the math
To start, I measured the pattern pieces used for the tiers.  I came up with the following:
  • bodice - 12 inches
  • middle (contrast) tier - 24 inches
  • bottom tier - 36 inches
A little math breakdown (24:12 = 2:1 and 36:24 = 3:2) shows where those magic numbers came from the other day.  Turns out they are pretty common ratios for ruffles.  If you get something awkward like 28:13 1/4, you can round it to 2:1.


2.  Attach the ruffles
You can choose to either ruffle the contrast strip and then sew it to the bodice, or you can ruffle AND join the two pieces at once.  I chose the latter.

The fabrics should be right sides together, with the fabric to be ruffled on top.  I like to line both fabrics up at the 5/8" guide and then slide them further into the ruffler until they are under the needle.  I have the top fabric folded back a bit so you can see that they are right sides together.
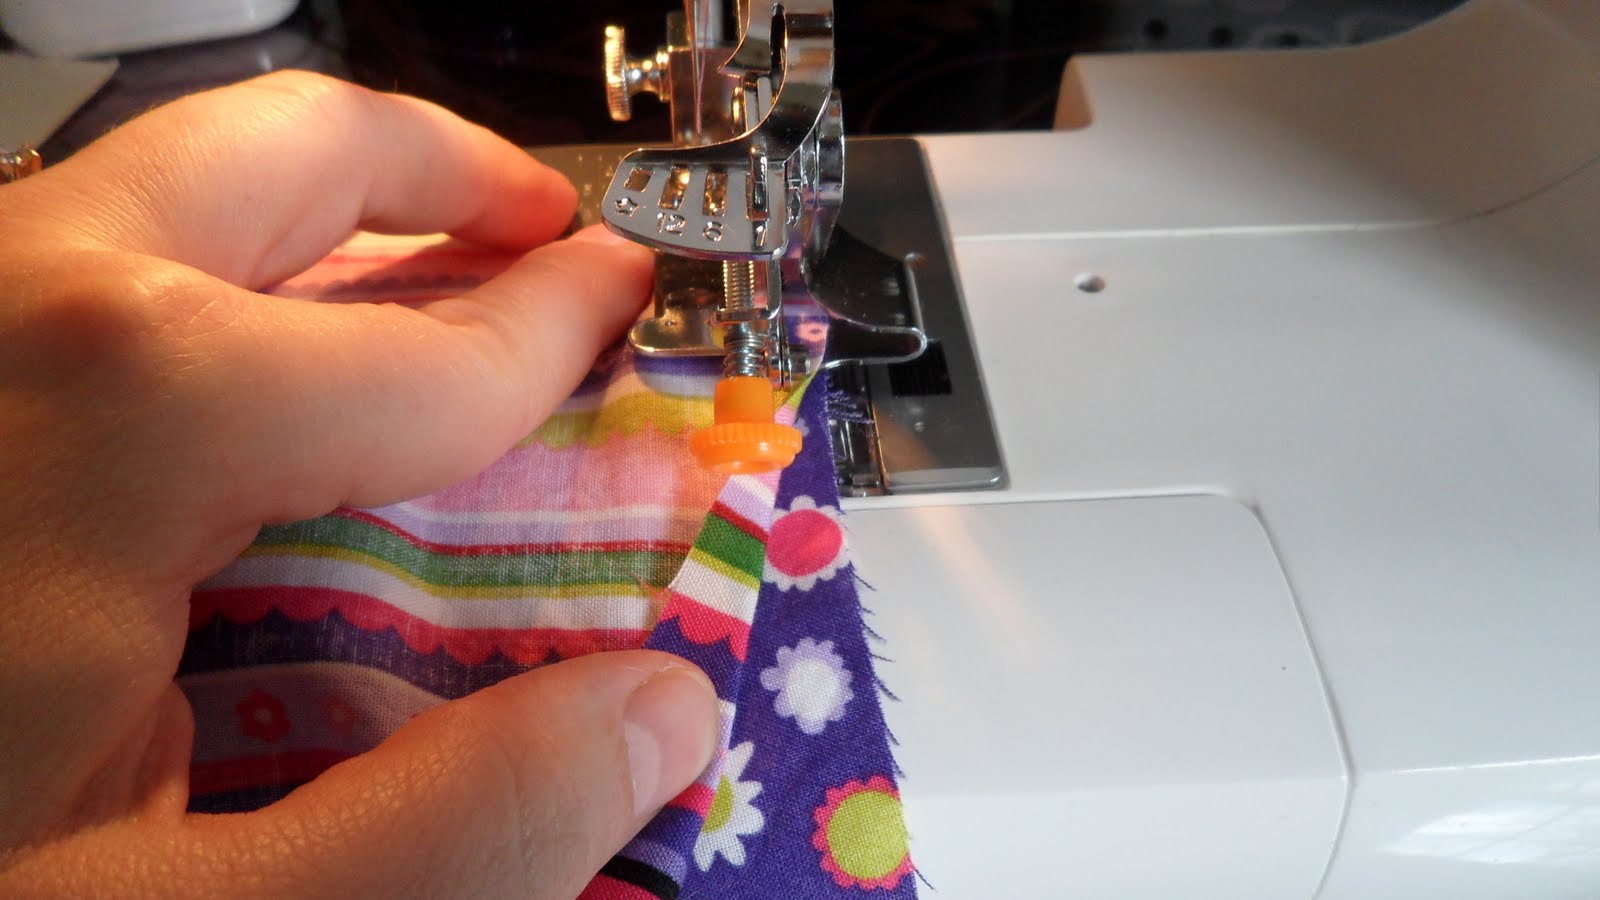


Put the presser foot down and turn the handwheel towards you to bring the needle into the fabric.  Start to sew, remembering you won't be doing a backstitch at the beginning or end of the seam. (You only want the fabric moving front-to-back through the ruffler).

To ruffle & attach at the same time, I like to hold the fabric on the bottom with my right hand resting on it, fingers flat.  Then I hold the fabric on top between the fingers and thumb on my left hand, lining it up with the guide as the fabric moves. 


Gather/sew the middle (striped) tier to the bodice.  You can see the extra "fudge factor" on the striped piece.


Trim some of the excess off--this will get neatened up later.  By trimming now, you avoid some waste with the bottom ruffle.


The bottom tier gets sewn to the dress the same way.


Now trim the extra off neatly.  I got fancy and broke out my rotary cutter and cutting mat for this.  Cut perpendicular to the seam, since your fabric was originally a rectangular strip.


Here's what it looks like after it's trimmed.


Here is the result once both sides are trimmed.  The front should look similar.


Finish the seams between the tiers in whatever method you prefer.  I serged them, but you can zigzag, overcast, bind them with bias tape, leave them be, whatever you want.


3.  Finish the dress

Sew the front to back at the side seams and finish them with your preferred method.


I constructed the rest of the dress by following the instructions for those parts:

Sleeves (I love the free arm on my machine--it makes it easier to sew baby and toddler sleeves)


Hem--instead of doing a narrow hem by folding under twice, I serged the edge and folded under once


Neckline--I also serged/folded under for the neckline casing


I added a size & "brand" label


Whew! It's finally done!


If you have any questions, you are always welcome to email me at: daniKatedesigns@gmail.com

*I might have made that phrase up.  It basically means to attach the ruffle while the fabric is flat (vs in a loop).  Derived from sewing in the round, a real phrase used to describe sewing sleeves. 
**A skirt would be made in a similar fashion, but leaving off the bodice/sleeves and finishing the waist per the pattern instructions. 

Friday, September 9, 2011

Tutorial: Using a Ruffler Foot--Setup

Some background:  Most of the clothes I sew these days are for my daughter, which means I sew a lot of ruffles and gathers, even though I'm not into really frilly stuff!  One of my favorite dresses is a 3-tiered peasant dress made from Simplicity 2377.  It's a quick sew, except for gathering the tiers.  I made some for my twin nieces and it took me an hour just to sew two tiers together (times 2 per dress times 2 dresses... yeah, it took a while).  Though I like the control one has when gathering "by hand", I thought a ruffler foot would be a good investment.


My adorable nieces in their dresses
(made before I had a ruffler foot)

When I bought my ruffler foot, I found it severely lacking in instructions.  And, while there are many resources on how to ruffle a strip of fabric (such as this one), there aren't many that tell how to use a ruffler foot to make a dress or a skirt, etc.  So I hope this two-part tutorial fills a niche.

This first part will cover the set up and test strips for using the ruffler foot and the next part will cover the dress construction (which is the all-important application portion).  Hopefully you will find ways to apply this information to whatever you may want to add ruffles to :)  If you have any questions or need clarification, please leave a comment or you can always reach me at: daniKateDesigns@gmail.com

Some general tips when using a ruffler foot:
  • MAKE SURE YOU PUT YOUR PRESSER FOOT DOWN TO SEW!
    (this can save you an hour of aggravated troubleshooting)
  • You do not want to back-stitch at the beginning or end, the fabric is only meant to go front-to-back through the ruffler.
  • The ruffler will sound noisy and a bit like it's broken, even though it's working.  It takes some getting used to.  It will, however, make a different noise if the blade gets bent and hit by the needle (ouch!).
  • Take a picture of your settings or write them down so that you can apply them to your project.  Be sure to note what kind of fabric you used, so you can reference your notes for future projects as well.

The following should help walk you through how to figure out a 2:1 and 3:2 gathering ratio for your ruffler.  I'll explain more about how these numbers can be used in the second part.  Try to just take a leap of sewing faith for now, okay?

1.  Gather materials
You'll need a ruffler foot (on right) and some 6-inch fabric strips to test your settings.


I used strips of fabric left over from cutting out my dress pieces.


2.  Set up your ruffler foot/sewing machine
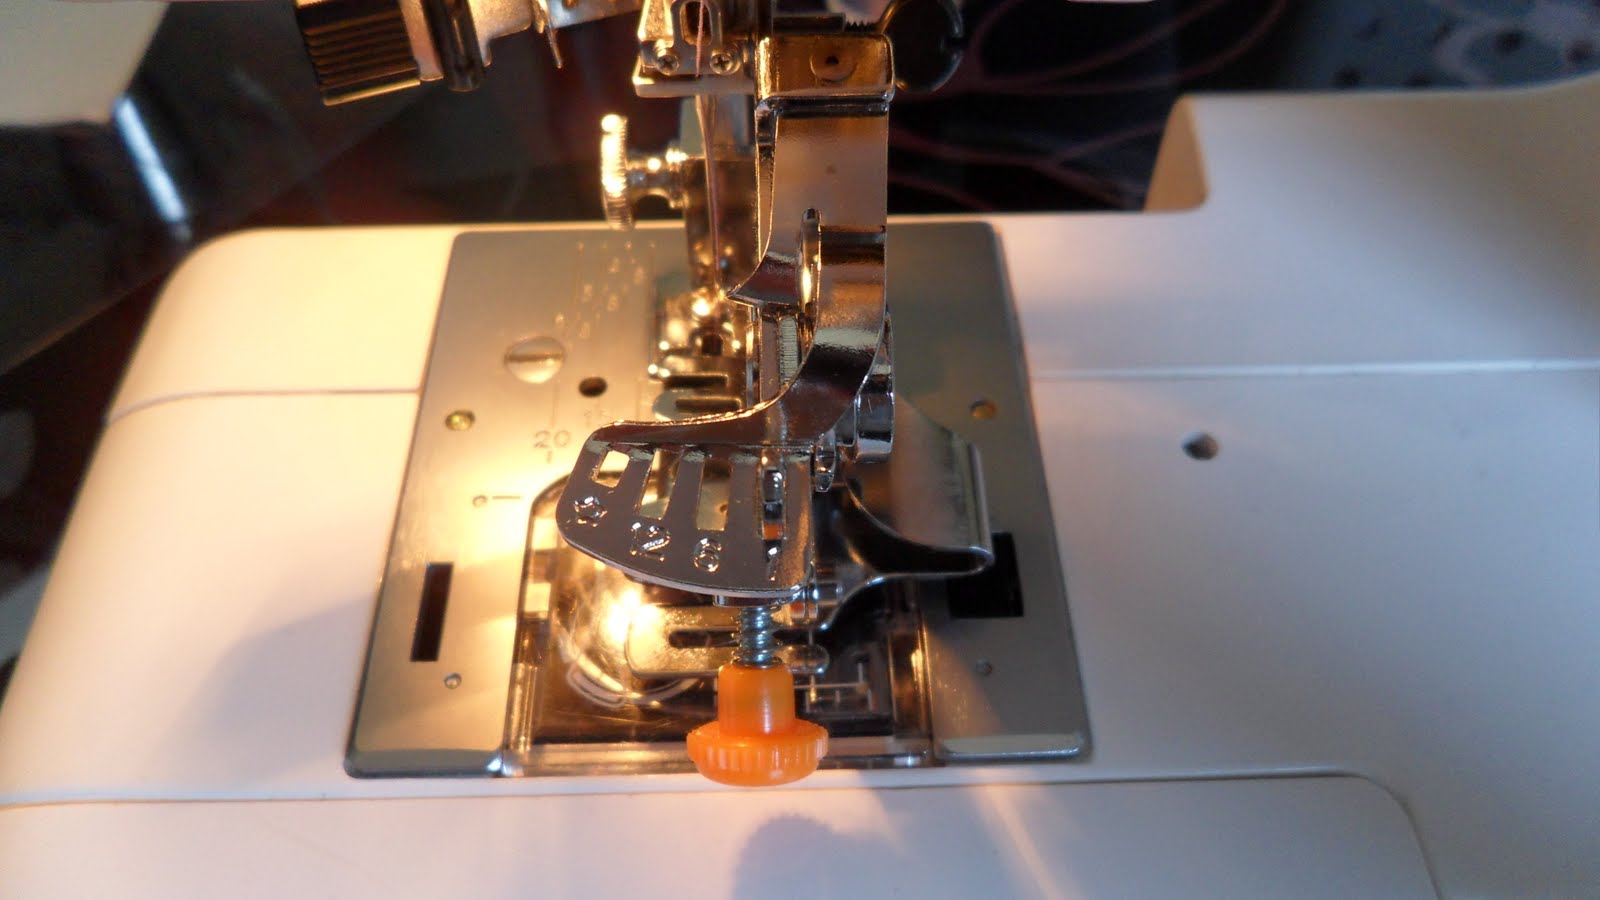
Here's the ruffler foot attached to my machine (there are lots of resources for help with this part).  Set your ruffler to "1", so it will gather at every stitch.


Set your machine to a long straight stitch (this is the longest setting I have on my machine).


3.  Test your settings
Here's where you'll have to experiment.  You'll need to set your adjustment screw (mine is the orange knob shown in the photos below) to change the depth of the gathers.  More threads showing at the end of the screw means a deeper pleat, which means your ruffle will be more ruffle-y. You want to figure out what settings you need for a 2:1 gather and a 3:2 gather.

For a 2:1 gather, I have about 4.5 threads showing at the end of the adjustment screw.


Insert a test strip into the ruffler foot.  It should go under the ruffling blade, which is what pushes the fabric to create the pleat/gather. 


Turn the handwheel to bring your needle into the fabric, then start sewing.  Remember, you do not want to backstitch.  Once you sew your first test strip, measure the end result & adjust the screw if needed.  Our goal is a 3 inch ruffle.
If it's too long, set the screw deeper
If it's too short, back the screw out some.

Keep testing strips until you get a ruffle that's about 3 inches long.  It doesn't have to be exact!  You just want it in the ballpark--ideally within a 1/4 inch or so, since the amount you are off will be multiplied with a longer piece of fabric.

Once you figure out where to position the screw to get your 2:1 gather, record it!  Take a picture, write it down, do whatever you need to to remember.  Then back the screw out to adjust for a 3:2 setting.


My setting for the 3:2 gathers is about 2.5 threads showing at the end of the adjustment screw.


Your ruffle should end up 4 inches long.  Remember to record this as your 3:2 setting.

Here are my resulting test strips.  The one on the left is the 2:1 gathers, and measures about 3 inches.  The one on the right is the 3:2 and measures about 4.25 inches.  Remember, the ruffler foot is supposed to save time, so you don't need to be overly exact.


Don't worry, this setup only takes this long the first time!  It is a good idea to do a quick test strip for each project, though, since different fabrics will gather differently.  But since you already have a baseline setting to start with, it should go quickly.


The next post will show how to use this information to make the dress.  That is what I consider the most helpful, so I hope you'll be back!
Related Posts Plugin for WordPress, Blogger...