Showing posts with label peasant dress. Show all posts

Friday, February 7, 2014

The Pretty Paris Dress

So I said no more princess dresses (for right now), and I mean that, but I need to be honest. This next dress is actually from a princess pattern. I just didn't have the right colors for a Tiana dress in my stash, and I wanted to see what the pattern would look like in "normal" fabrics.


I am absolutely in love with this pattern (it's the Tiana Dress pattern from Made for Mermaids). It's a peasant style dress but the bodice is shaped, like a good peasant dress pattern should be (that means the front and back have different necklines and aren't just blocky). It has a sash which means a better fit for my slim girl. And the skirt, oh the skirt!


These pictures don't do it justice. There is an underskirt that hangs just the right amount below the overskirt. The overskirt is split in the front and back and the curve at the side seams is PERFECT. It is just such a pretty shape and is drafted to meet up so nicely. I love the way this dress is suited for using coordinating prints. (Oh, and it looks so beautiful as a Tiana dress that I went out right after making this to pick up the fabrics for another princess dress!)


I just think this is such a sweet, modest, pretty dress. It's simple enough to make (it is a peasant style), but it has some interesting details and it's just so pretty!! I need to go back and try some of my other "princess" patterns with non-princess fabrics now, to see how they turn out!

Saturday, September 14, 2013

Astra Peasant Dress

5Berries recently released the Astra Dress, which I had the pleasure to test a couple weeks ago. It's a tiered peasant dress, similar to Simplicity 2377 which I've blogged about here and that I show in my Ruffler Foot Tutorials.


The biggest differences are that this pattern includes long sleeves and has a casing on the outside waistline to cinch in some of the fullness. My husband thought the sleeves were a bit poofy, but I think they look wonderfully comfortable.

I think they're just right :)


Danielle has been wearing uniforms to pre-K, so we haven't really purchased "regular" clothes for her for the fall. So I'm super excited that I've had the chance to make some long-sleeve dresses for church. I normally am behind in my sewing, not ahead of the seasons!

Let's pretend this picture is her looking
proud of me for sewing ahead, mkay?


I never intended these two fabrics to go together, since they are the same scale, but I think it really works for this dress since the tiers are all the same height.  I am pretty pleased with how this turned out.

You can see the fullness (though it's
not really shorter in the front like it looks)


I will definitely be making this one again, though I may mash it up with another pattern so that I can skip the waistline casing. Or I could just slim the bodice down and take a little width off the top tier. We'll see. I use patterns so I don't have to do the figuring myself :)

Saturday, August 10, 2013

5Berries Testing


I'm so ashamed! One of the shops I test the most for happens to be the one I blog the least about, for no good reason. Anna, the designer for 5Berries and Dress Patterns 4 Girls has created some really cute designs, including the Eva peasant dress I blogged about here and the Gatsby dress that I haven't shared pictures of yet. The Juliet dress (pictured above) is her newest pattern. It's hard to tell with my crazy prints (which look good together in natural light but not with my camera flash), but this dress has a poofier upper sleeve and a slimmer lower sleeve, reminiscent of Juliet (from the famous play).

A lot of her dresses do tend to be variations of the peasant dress, but she offers some cute details and her sloper for this style is my favorite. There is just the right amount of flare in the A-line and the neckline is lower in the front than it is in the back. I've used her basic peasant dress with some length added to make nightgowns for Danielle the past two summers. The dress shown below was a test that turned out a little short, so that ended up as a nightgown as well, just one that has a cute flutter sleeve detail :)


Besides dresses, she also has some patterns for rompers, skirts, pants, etc. I tested the Emily capris back in April (I think?) and the bow detail is really darling. Make sure you secure the bow in the loop though, or you will lose one and never get around to making a new one and then the pants won't do much good, mkay?  Sigh, these pants went with everything my pink-loving daughter owns.


Anna was a tailor who made custom women's clothes before moving to the United States, so some of her methods in her earlier patterns didn't make sense to me (like hand basting where to hem).  When I emailed her to ask about some of her construction "oddities", she asked for more feedback like that! I'm impressed with her commitment to make her patterns the best they can be, and easy for anyone to understand.

If you haven't tried a 5Berries (or Dress Patterns 4 Girls) pattern yet, you really should! They are easy enough for a beginner, while still having some unique styles (isn't this Ava dress pattern darling?) Oh, and she's started making some patterns with knits too. Bonus!

Friday, March 22, 2013

Daycare Photoshoot Woes

I was looking for pictures of an outfit I made recently when I stumbled across a dress I haven't shared yet. Partly because I forgot, partly because it was a pattern test (of course) and I was waiting for the designer to release it, and partly because the pictures were not great.

This one doesn't stink, but you can't see the dress

I don't want to be one of those bloggers who complains about the quality of my photos, because you get what you get with toddlers, BUT, have you ever tried to take pictures of an outfit at a daycare?  It's IMPOSSIBLE to get a good backdrop. There are so many colors and decorations and if you happen to find a wall that is temporarily uncovered (which I did), it will be the ugliest part of the hallway. And, to make matters worse, your kid will be wearing shoes that don't match and you'll have to crop her feet out of every single picture.

The dress is cute though :)

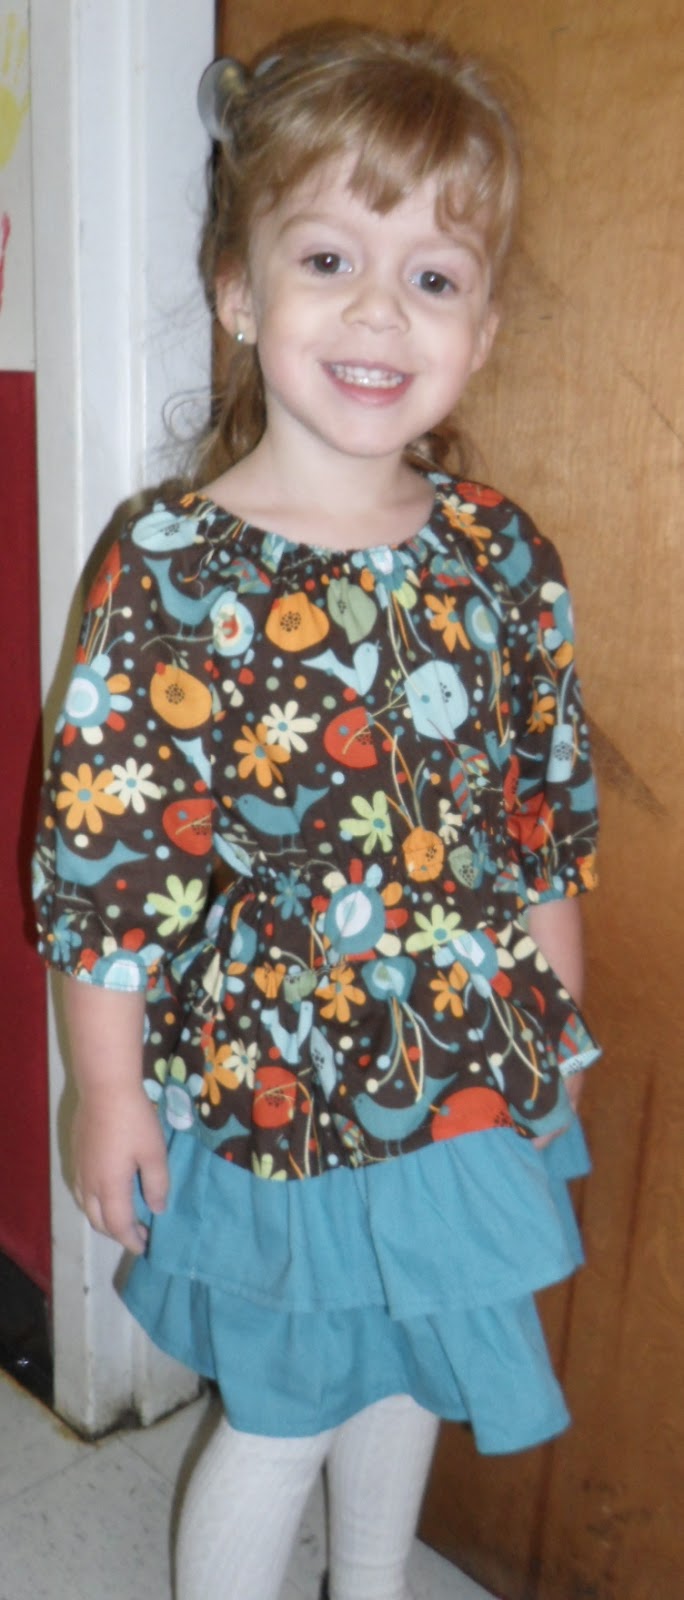
I had meant to take better pictures, because this dress is super cute and I wanted to show it off.  Plus, it took a decent bit of time to make. It's the Eva dress from 5Berries and it's a peasant dress with some sweet details. I chose to make the version with the 3/4 length sleeves and contrast colored ruffles.

That hair, on that girl, took forever!
My sweet girl has the attention span
of a gnat when it's time to do her hair.


There are 3 ruffles but the top one is made out of the bodice fabric, which gives it a nice proportion and makes it look like a top and skirt. You might be able to see the elastic at the waist in the next picture--that's the best part! It gives shape at the waist, obviously, but it is also what makes the ruffles flare out a bit and gives them their shape as well.

My cheeseball loved it!

I really love this dress and will definitely make it again. It does take some time to gather and hem the ruffles, but I am going to do my own thing with that part of the construction to make it go a little quicker next time. There's a short sleeve version as well, which would be great for spring, if it ever decides to stick around!

Sunday, October 14, 2012

Trio of Three-Tiered Dresses

I recently finished up a trio of dresses to give to friends.  First up was a pair of dresses for 3-year-old Lucy and 2-year-old Molly.

I graded the size 3 pattern down to make the size 2, since
the pattern starts at size 3


I got a little carried away making fabric flowers.  They were quick, easy and fun to make.  I used a method similar to this one.  Basically, you cut flower shapes out of fabric, fold them in half, then thirds, and glue them down to a felt circle.  Stagger 2 layers, then strategically glue some petals together so they fluff up, and roll up a flower piece or two to glue down in the middle.  Attach an alligator clip on the back,  cover it with some felt for security, and you're done!


I also made a tiered peasant dress for Nora, who is 5.  I used Simplicity 2377 to make the dresses, changing the construction a little bit to use a ruffler foot.  You can find loads of details about that in my ruffler foot tutorials.

I made size 6 so there was room to grow


I made some flower clips for Nora, including a gi-normous purple one which was my first try and the size of a small plate.  I sent that along in case her mommy wanted to match.

The large flower weighs quite a bit too.  I didn't realize
how much weight all the hot glue would add!

I have now made this dress 7 times and not one was for Danielle!  It makes me feel like a bad mommy, but she will get one.  In fact, I think I'm going to make a modified version for a princess dress Halloween costume.  (Just a generic princess, not a specific Disney one).  We were going to be the Flintstone Family this year, but my husband will only be able to catch the tail end of trick or treating, so I'm not going to make a group costume for the family until we can all be together.

Sunday, September 11, 2011

Tutorial: Using a Ruffler Foot--Construction

I mentioned in the last post that there's a difference between learning to gather with a ruffler foot and learning to use it to make a garment.

My current favorite dress style involves LOTS of gathering


The first key to using a ruffler foot in a garment is that you want to gather and attach the ruffle in the flat.*  Instead of sewing strips of fabric to make a loop, which is gathered and then sewn on (say, to the bottom of a skirt), we'll sew the ruffles on to the front and back, then stitch the sides together.

Using a ruffler foot this way saves time, but does take some forethought.

We'll construct two pieces like this, then sew them together


The other key is to leave wiggle room when you cut your ruffle strips.  If you cut them the exact length you need, then you have to ruffle them exactly.  If you cut them a few inches longer, you don't have to spend so much time trying to be precise.  You can gather the strips quickly with your ruffler foot, attach them, and trim off any excess.


1.  Do the math
To start, I measured the pattern pieces used for the tiers.  I came up with the following:
  • bodice - 12 inches
  • middle (contrast) tier - 24 inches
  • bottom tier - 36 inches
A little math breakdown (24:12 = 2:1 and 36:24 = 3:2) shows where those magic numbers came from the other day.  Turns out they are pretty common ratios for ruffles.  If you get something awkward like 28:13 1/4, you can round it to 2:1.


2.  Attach the ruffles
You can choose to either ruffle the contrast strip and then sew it to the bodice, or you can ruffle AND join the two pieces at once.  I chose the latter.

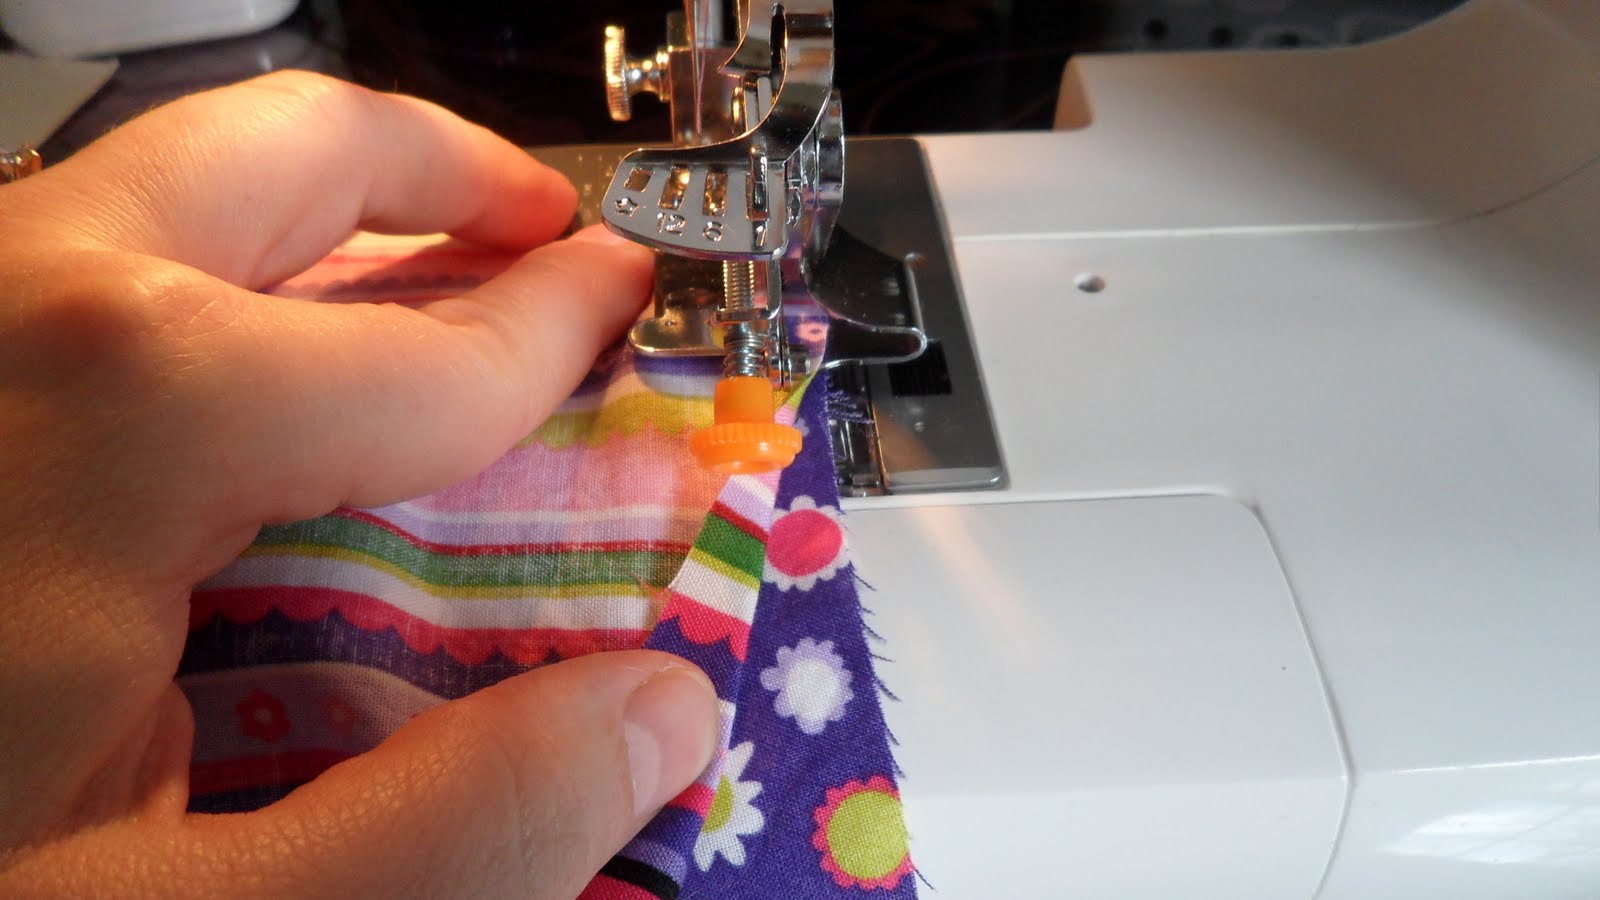
The fabrics should be right sides together, with the fabric to be ruffled on top.  I like to line both fabrics up at the 5/8" guide and then slide them further into the ruffler until they are under the needle.  I have the top fabric folded back a bit so you can see that they are right sides together.


Put the presser foot down and turn the handwheel towards you to bring the needle into the fabric.  Start to sew, remembering you won't be doing a backstitch at the beginning or end of the seam. (You only want the fabric moving front-to-back through the ruffler).

To ruffle & attach at the same time, I like to hold the fabric on the bottom with my right hand resting on it, fingers flat.  Then I hold the fabric on top between the fingers and thumb on my left hand, lining it up with the guide as the fabric moves. 


Gather/sew the middle (striped) tier to the bodice.  You can see the extra "fudge factor" on the striped piece.


Trim some of the excess off--this will get neatened up later.  By trimming now, you avoid some waste with the bottom ruffle.


The bottom tier gets sewn to the dress the same way.


Now trim the extra off neatly.  I got fancy and broke out my rotary cutter and cutting mat for this.  Cut perpendicular to the seam, since your fabric was originally a rectangular strip.


Here's what it looks like after it's trimmed.


Here is the result once both sides are trimmed.  The front should look similar.


Finish the seams between the tiers in whatever method you prefer.  I serged them, but you can zigzag, overcast, bind them with bias tape, leave them be, whatever you want.


3.  Finish the dress

Sew the front to back at the side seams and finish them with your preferred method.


I constructed the rest of the dress by following the instructions for those parts:

Sleeves (I love the free arm on my machine--it makes it easier to sew baby and toddler sleeves)


Hem--instead of doing a narrow hem by folding under twice, I serged the edge and folded under once


Neckline--I also serged/folded under for the neckline casing


I added a size & "brand" label


Whew! It's finally done!


If you have any questions, you are always welcome to email me at: daniKatedesigns@gmail.com

*I might have made that phrase up.  It basically means to attach the ruffle while the fabric is flat (vs in a loop).  Derived from sewing in the round, a real phrase used to describe sewing sleeves. 
**A skirt would be made in a similar fashion, but leaving off the bodice/sleeves and finishing the waist per the pattern instructions. 

Friday, September 9, 2011

Tutorial: Using a Ruffler Foot--Setup

Some background:  Most of the clothes I sew these days are for my daughter, which means I sew a lot of ruffles and gathers, even though I'm not into really frilly stuff!  One of my favorite dresses is a 3-tiered peasant dress made from Simplicity 2377.  It's a quick sew, except for gathering the tiers.  I made some for my twin nieces and it took me an hour just to sew two tiers together (times 2 per dress times 2 dresses... yeah, it took a while).  Though I like the control one has when gathering "by hand", I thought a ruffler foot would be a good investment.


My adorable nieces in their dresses
(made before I had a ruffler foot)

When I bought my ruffler foot, I found it severely lacking in instructions.  And, while there are many resources on how to ruffle a strip of fabric (such as this one), there aren't many that tell how to use a ruffler foot to make a dress or a skirt, etc.  So I hope this two-part tutorial fills a niche.

This first part will cover the set up and test strips for using the ruffler foot and the next part will cover the dress construction (which is the all-important application portion).  Hopefully you will find ways to apply this information to whatever you may want to add ruffles to :)  If you have any questions or need clarification, please leave a comment or you can always reach me at: daniKateDesigns@gmail.com

Some general tips when using a ruffler foot:
  • MAKE SURE YOU PUT YOUR PRESSER FOOT DOWN TO SEW!
    (this can save you an hour of aggravated troubleshooting)
  • You do not want to back-stitch at the beginning or end, the fabric is only meant to go front-to-back through the ruffler.
  • The ruffler will sound noisy and a bit like it's broken, even though it's working.  It takes some getting used to.  It will, however, make a different noise if the blade gets bent and hit by the needle (ouch!).
  • Take a picture of your settings or write them down so that you can apply them to your project.  Be sure to note what kind of fabric you used, so you can reference your notes for future projects as well.

The following should help walk you through how to figure out a 2:1 and 3:2 gathering ratio for your ruffler.  I'll explain more about how these numbers can be used in the second part.  Try to just take a leap of sewing faith for now, okay?

1.  Gather materials
You'll need a ruffler foot (on right) and some 6-inch fabric strips to test your settings.


I used strips of fabric left over from cutting out my dress pieces.


2.  Set up your ruffler foot/sewing machine
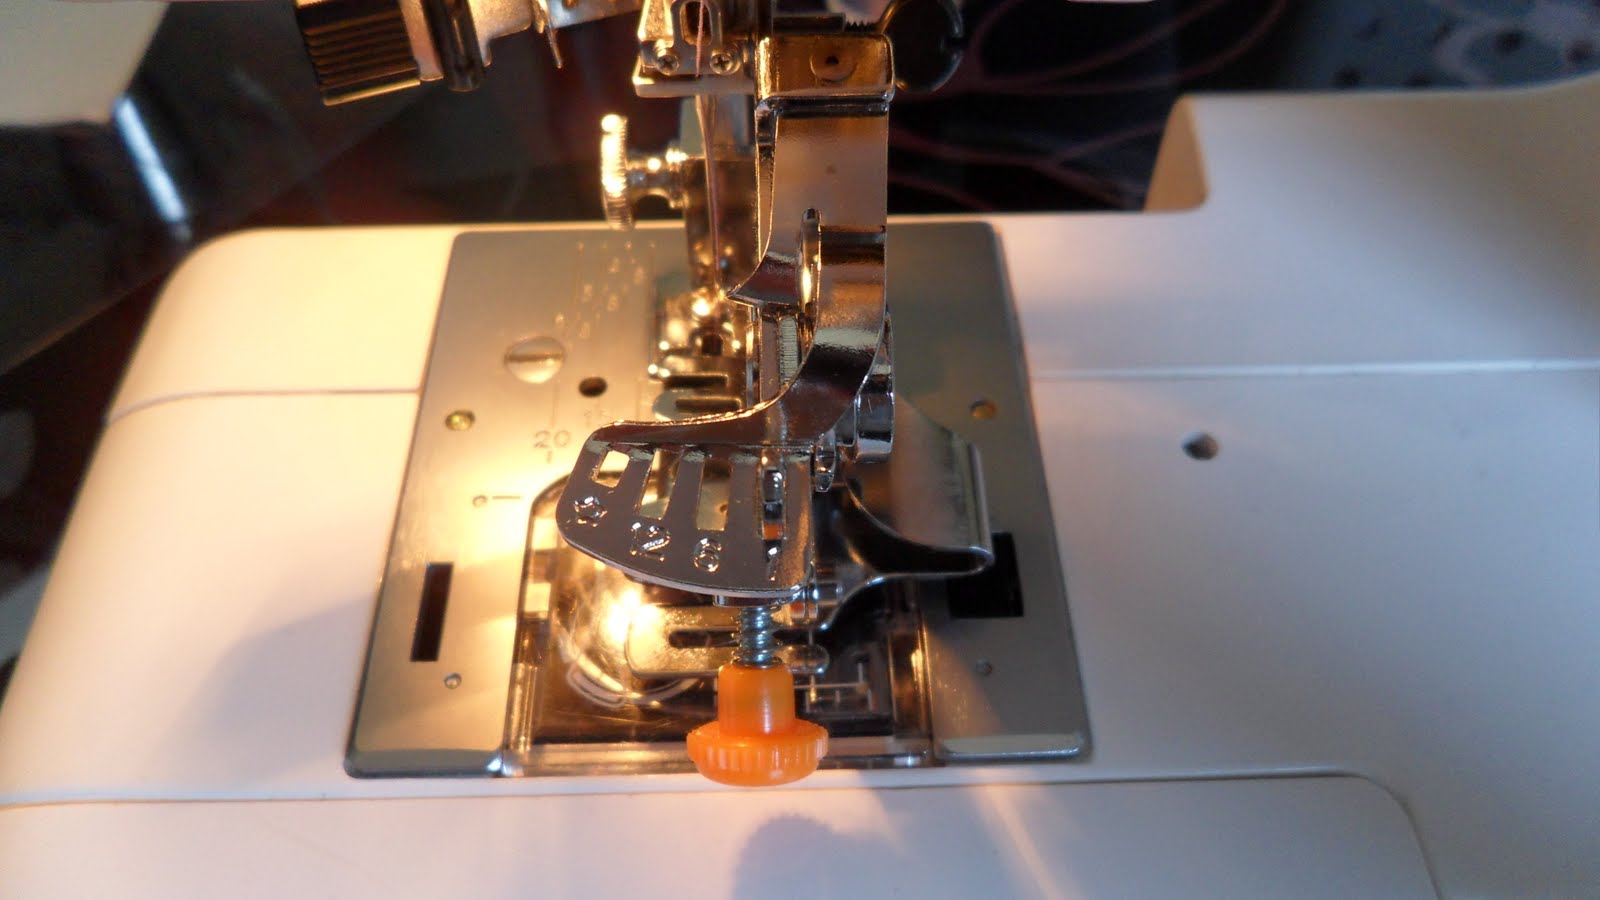
Here's the ruffler foot attached to my machine (there are lots of resources for help with this part).  Set your ruffler to "1", so it will gather at every stitch.


Set your machine to a long straight stitch (this is the longest setting I have on my machine).


3.  Test your settings
Here's where you'll have to experiment.  You'll need to set your adjustment screw (mine is the orange knob shown in the photos below) to change the depth of the gathers.  More threads showing at the end of the screw means a deeper pleat, which means your ruffle will be more ruffle-y. You want to figure out what settings you need for a 2:1 gather and a 3:2 gather.

For a 2:1 gather, I have about 4.5 threads showing at the end of the adjustment screw.


Insert a test strip into the ruffler foot.  It should go under the ruffling blade, which is what pushes the fabric to create the pleat/gather. 


Turn the handwheel to bring your needle into the fabric, then start sewing.  Remember, you do not want to backstitch.  Once you sew your first test strip, measure the end result & adjust the screw if needed.  Our goal is a 3 inch ruffle.
If it's too long, set the screw deeper
If it's too short, back the screw out some.

Keep testing strips until you get a ruffle that's about 3 inches long.  It doesn't have to be exact!  You just want it in the ballpark--ideally within a 1/4 inch or so, since the amount you are off will be multiplied with a longer piece of fabric.

Once you figure out where to position the screw to get your 2:1 gather, record it!  Take a picture, write it down, do whatever you need to to remember.  Then back the screw out to adjust for a 3:2 setting.


My setting for the 3:2 gathers is about 2.5 threads showing at the end of the adjustment screw.


Your ruffle should end up 4 inches long.  Remember to record this as your 3:2 setting.

Here are my resulting test strips.  The one on the left is the 2:1 gathers, and measures about 3 inches.  The one on the right is the 3:2 and measures about 4.25 inches.  Remember, the ruffler foot is supposed to save time, so you don't need to be overly exact.


Don't worry, this setup only takes this long the first time!  It is a good idea to do a quick test strip for each project, though, since different fabrics will gather differently.  But since you already have a baseline setting to start with, it should go quickly.


The next post will show how to use this information to make the dress.  That is what I consider the most helpful, so I hope you'll be back!
Related Posts Plugin for WordPress, Blogger...